Create a Vault
This guide might contain outdated information and will be updated soon.
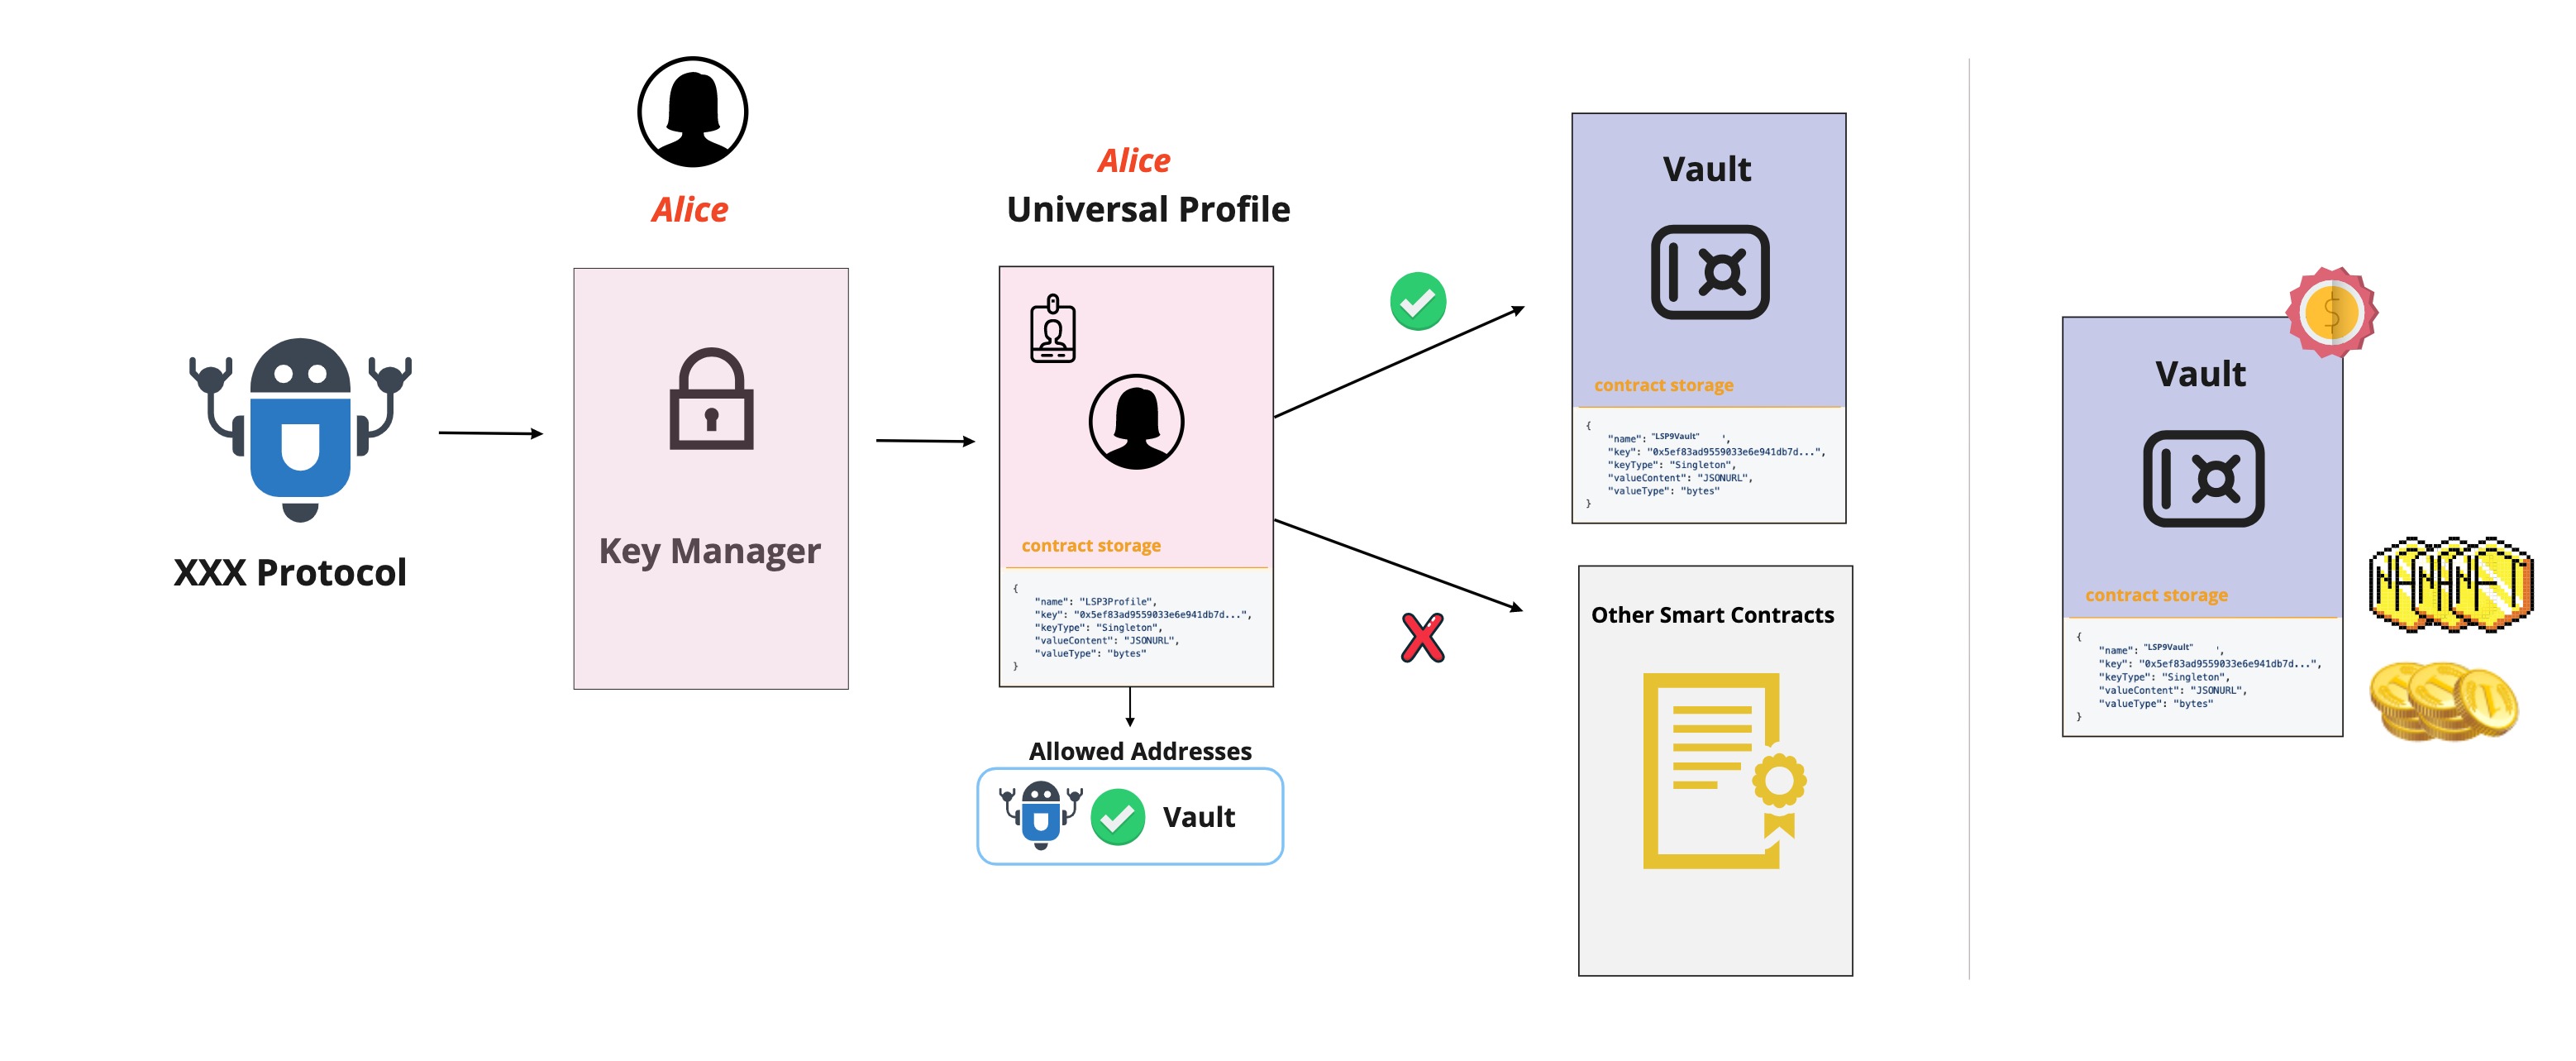
This guide will teach you how to deploy an LSP9Vault contract. This contract can be used to hold assets such as tokens and NFTs. Also can be used with a UniversalProfile and a KeyManager to restrict some addresses (protocols, friends, etc..) to execute and setData on it, instead of setting or executing directly on the profile.
Deploy an LSP9Vault contract
To start with this guide you will need the following things:
- The private key of your account, in order to send the transaction.
- The address of a Universal Profile
Make sure you have the following dependencies installed before beginning this tutorial:
- Either
web3.jsorethers.js @lukso/lsp-smart-contracts
- web3
- ethers.js
npm install web3 @lukso/lsp-smart-contracts
npm install ethers @lukso/lsp-smart-contracts
Step 1 - Setup imports and constants
For the imports, we will need the LSP9vault contract ABI and bytecode in order to deploy a LSP9 Vault.
For the constants we will need the private key and the address of the vault receiver.
- web3
- ethers.js
import LSP9Vault from '@lukso/lsp-smart-contracts/artifacts/LSP9Vault.json';
import Web3 from 'web3';

const web3 = new Web3('https://rpc.testnet.lukso.network');
const vaultOwner = '0x...'; // The address that will be the vault owner

// initialize your EOA
const privateKey = '0x...';
const myEOA = web3.eth.accounts.wallet.add(privateKey);
import LSP9Vault from '@lukso/lsp-smart-contracts/artifacts/LSP9Vault.json';
import { ethers } from 'ethers';

const provider = new ethers.providers.JsonRpcProvider(
  'https://rpc.testnet.lukso.network',
);
const vaultOwner = '0x...'; // The address that will be the vault owner

// setup your EOA
const privateKey = '0x...';
const myEOA = new ethers.Wallet(privateKey).connect(provider);
Step 2 - Instantiate contracts
Create instance for LSP9Vault, that is needed in order to deploy the contract.
- web3
- ethers.js
// create an instance of the LSP9Vault contract
let myVault = new web3.eth.Contract(LSP9Vault.abi);
// create an factory for the LSP9Vault contract
let vaultFactory = new ethers.ContractFactory(
  LSP9Vault.abi,
  LSP9Vault.bytecode,
);
Step 3 - Send transaction
Finally send the contract deployment transaction.
- web3
- ethers.js
// deploy the vault contract
await myVault
  .deploy({
    data: LSP9Vault.bytecode,
    arguments: [vaultOwner],
  })
  .send({
    from: myEOA.address,
    gas: 5_000_000,
    gasPrice: '1000000000',
  });
// deploy the vault contract
const myVault = await vaultFactory.connect(myEOA).deploy(vaultOwner);
Final Code
You need to have LYXt in your EOA in order to pay for the transaction fees. Visit the ➡️ LUKSO Testnet Faucet Website to get some LYXt.
- web3
- ethers.js
import LSP9Vault from '@lukso/lsp-smart-contracts/artifacts/LSP9Vault.json';
import Web3 from 'web3';

const web3 = new Web3('https://rpc.testnet.lukso.network');
const vaultOwner = '0x...'; // The address that will be the vault owner

// initialize your EOA
const privateKey = '0x...';
const myEOA = web3.eth.accounts.wallet.add(privateKey);

// create an instance of the LSP9Vault contract
let myVault = new web3.eth.Contract(LSP9Vault.abi);

// deploy the vault contract
await myVault
  .deploy({
    data: LSP9Vault.bytecode,
    arguments: [vaultOwner],
  })
  .send({
    from: myEOA.address,
    gas: 5_000_000,
    gasPrice: '1000000000',
  });
import LSP9Vault from '@lukso/lsp-smart-contracts/artifacts/LSP9Vault.json';
import { ethers } from 'ethers';

const provider = new ethers.providers.JsonRpcProvider(
  'https://rpc.testnet.lukso.network',
);
const vaultOwner = '0x...'; // The address that will be the vault owner

// setup your EOA
const privateKey = '0x...';
const myEOA = new ethers.Wallet(privateKey).connect(provider);

// create an factory for the LSP9Vault contract
let vaultFactory = new ethers.ContractFactory(
  LSP9Vault.abi,
  LSP9Vault.bytecode,
);

// deploy the vault contract
const myVault = await vaultFactory.connect(myEOA).deploy(vaultOwner);