Connect a Universal Profile
Universal Profiles can connect to dApps on LUKSO using one of the two UP Apps available:
Connecting your Universal Profile will trigger one the following connection screen.
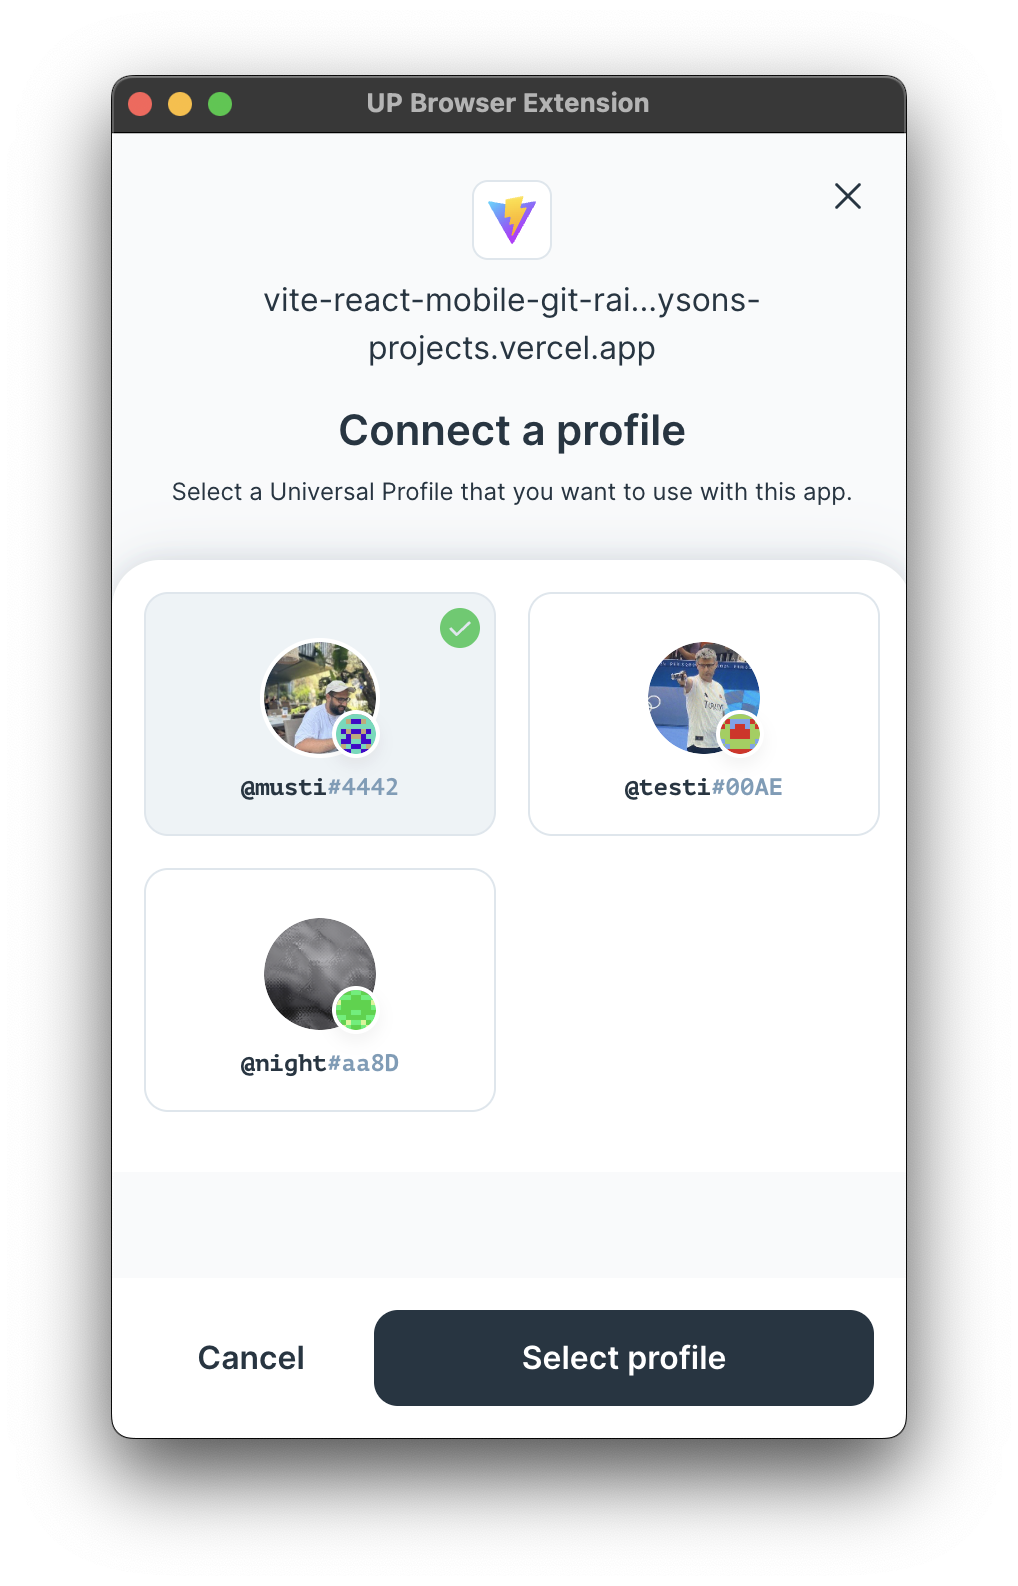
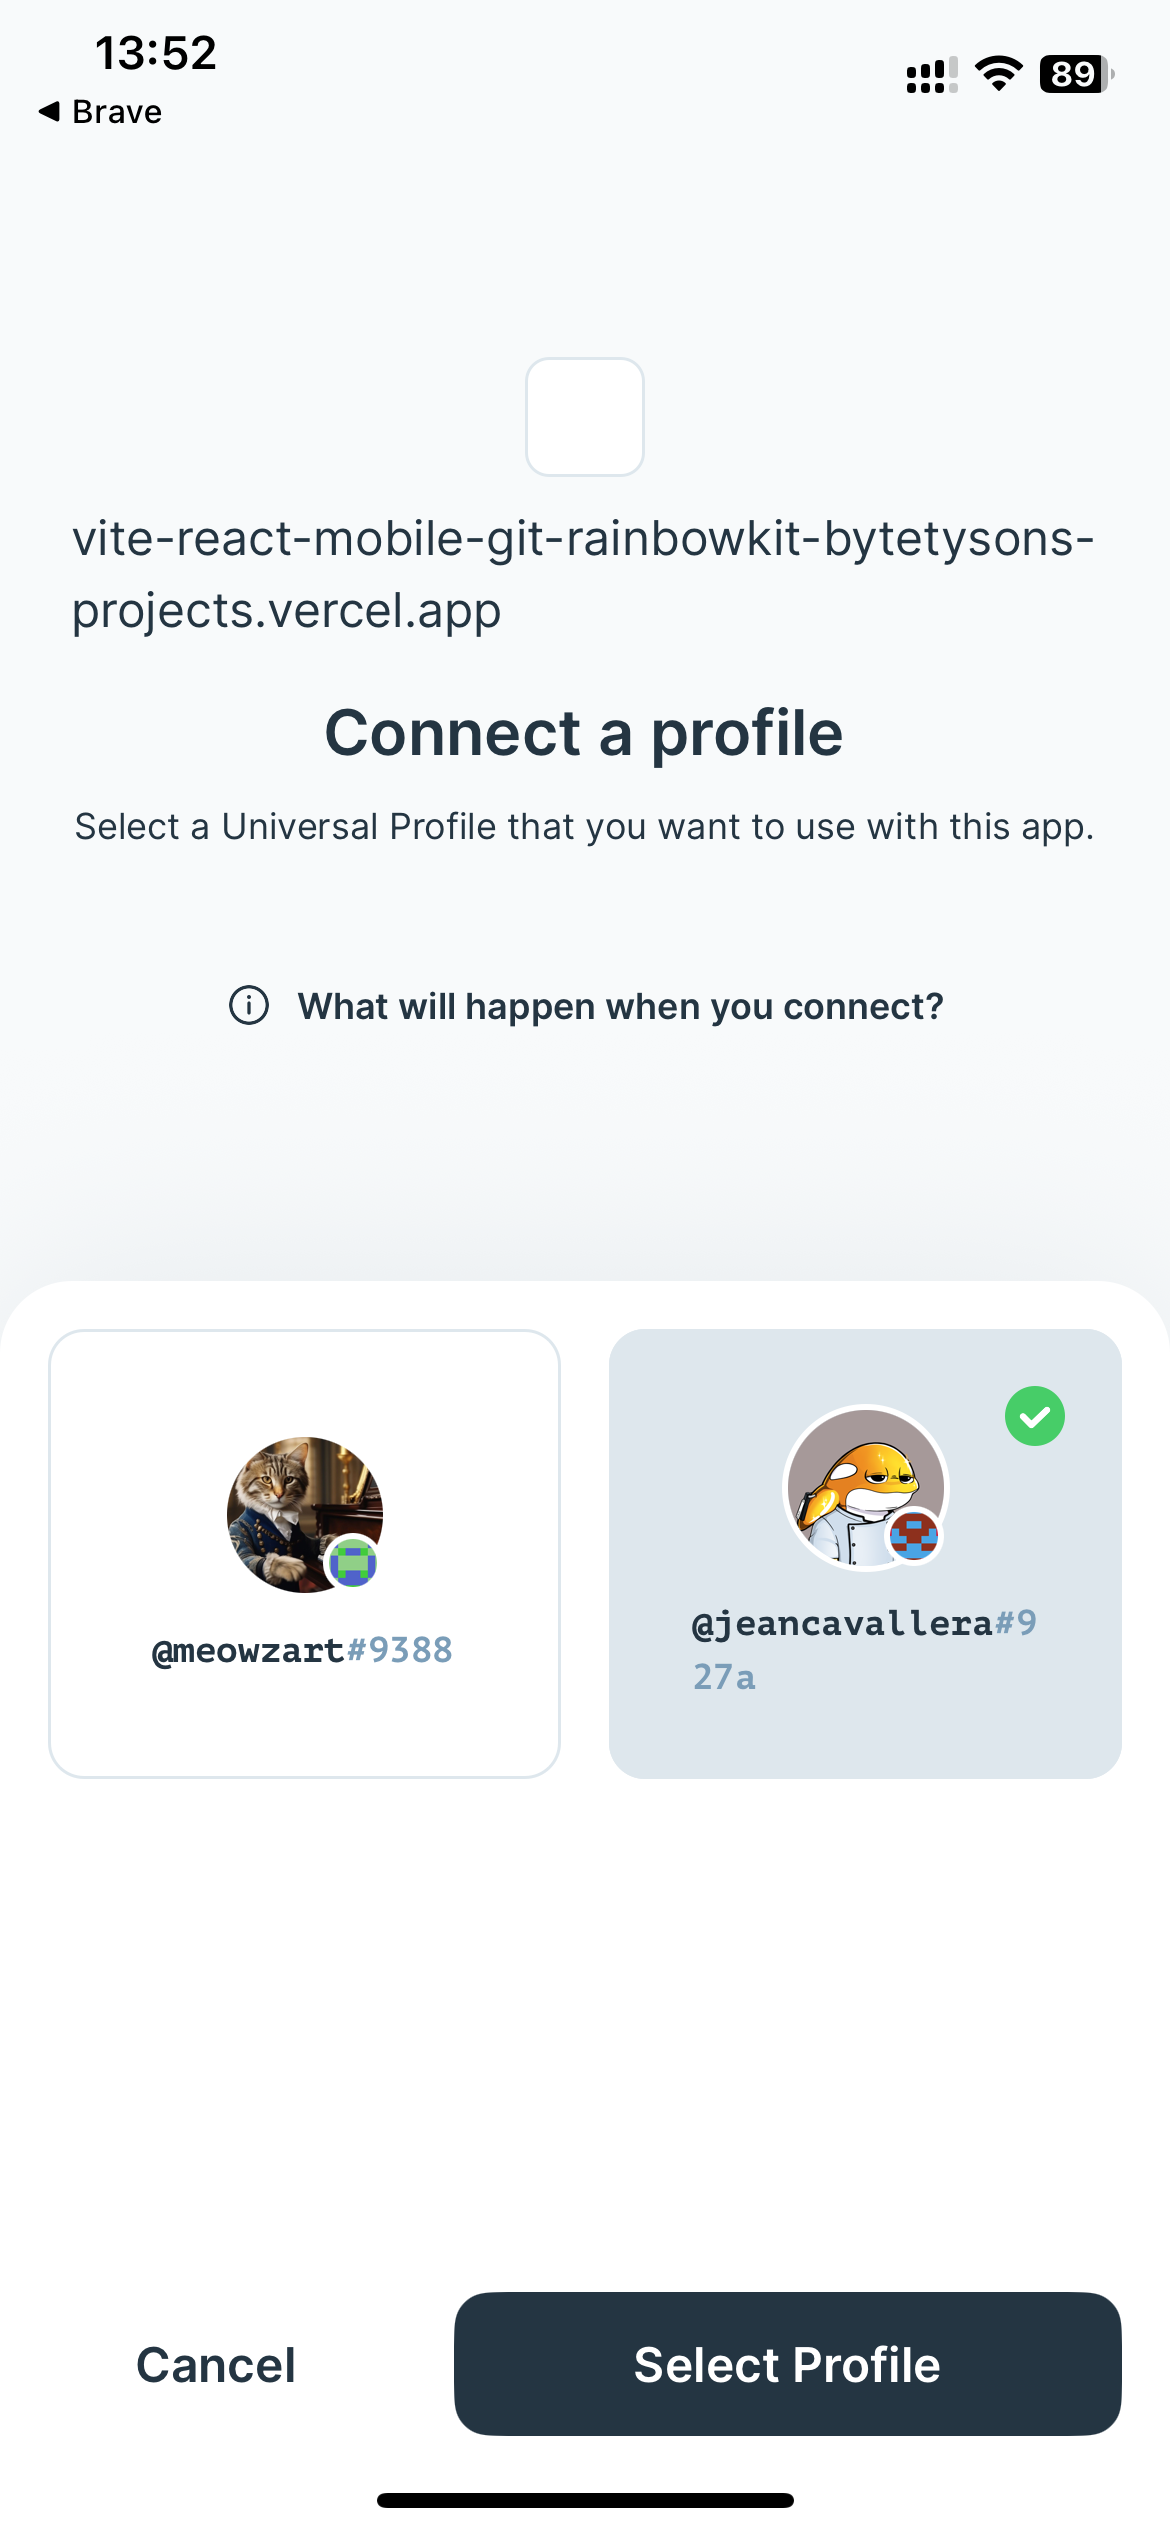
The Universal Profile Extension returns the address of the connected Universal Profile. Making transactions is the same as with any wallet, you just use the profile address as a from in your transactions.
Connection Methods
There are multiple ways to connect a dApp to Universal Profiles, from high-level libraries to low-level provider access. Choose the method that best fits your application's needs:
| Option | Difficulty | Recommended for |
|---|---|---|
| Third-Party Libraries | Easy 🌶️ Plug in existing connectors and focus on UX. | Most dApps. Provides pre-built components, ready-made modals, with multi-wallet support out of the box and connection logic handled automatically. Recommended for quick and easy integration while keeping a seamless user experience. |
| Provider Injection | Medium 🌶️🌶️ Require to manage the window.lukso object. | Lightweight builds needing minimal dependencies and full control over wallet connection logic. Recommended for full control over the connection logic (e.g: only allow UPs to connect) and to build custom connection modals. |
| Provider Discovery | Complex 🌶️🌶️🌶️ Connect multiple wallet extensions simultaneously. | Advanced apps where users run several extensions (e.g., MetaMask + Universal Profile) simultaneously using EIP-6963. Recommended for handling multiple connected wallets. |
Currently, only the third-party libraries method can be used to connect the 📱 UP Mobile App to a dApp.
Third-Party Libraries
You can connect to Universal Profile using the following third-party libraries. These libraries simplify dApp development by abstracting complex wallet connection logic:
- RainbowKit (since
v2.2.9) - Reown AppKit (formerly WalletConnect)
See flow diagram on how third party libraries handle the connection flow with EIP-6963
Choose your preferred library and follow the configuration steps below. Both options are built on top of Wagmi!
- 🌈 RainbowKit
- Reown AppKit
Step 1: Install Dependencies
npm install @rainbow-me/rainbowkit wagmi @tanstack/react-query
Step 2: Configure Wagmi with LUKSO and RainbowKit Connectors
Set up Wagmi configuration with LUKSO network and RainbowKit's Universal Profile wallet connector:
universalProfilesWallet connector is required to integrate your app with the Universal Profiles Mobile App.
import { WagmiProvider, createConfig, http } from 'wagmi';
import { lukso } from 'wagmi/chains';
import { connectorsForWallets } from '@rainbow-me/rainbowkit';
import { QueryClient, QueryClientProvider } from '@tanstack/react-query';
import { universalProfilesWallet } from '@rainbow-me/rainbowkit/wallets';

// Wagmi uses QueryClient to manage cache, background updates, and request deduplication.
// This is required to provide <QueryClientProvider> higher up in your component tree.
const queryClient = new QueryClient();

const config = createConfig({
  chains: [lukso],
  transports: {
    [lukso.id]: http(),
  },
  connectors: connectorsForWallets(
    [
      {
        groupName: 'Login with Universal Profile',
        wallets: [universalProfilesWallet],
      },
    ],
    {
      appName: 'LUKSO dApp',
      projectId: 'YOUR_PROJECT_ID', // Get your project ID from WalletConnect Cloud
    },
  ),
});
Step 3: Wrap Your App with Providers
Import RainbowKit styles and wrap your application with the required providers in the correct order:
import { RainbowKitProvider } from '@rainbow-me/rainbowkit';
import '@rainbow-me/rainbowkit/styles.css';

function App() {
  return (
    <WagmiProvider config={config}>
      <QueryClientProvider client={queryClient}>
        <RainbowKitProvider>
          {/*
            Place your main application content here.
            <YourAppContent />

            This ensures that all components within <YourAppContent />
            have access to the connected wallet context provided by WagmiProvider,
            enabling features like reading connection state or sending transactions.
          */}
        </RainbowKitProvider>
      </QueryClientProvider>
    </WagmiProvider>
  );
}
Step 4: Add the Connect Button
Use RainbowKit's pre-built ConnectButton component to handle wallet connections:
import { ConnectButton } from '@rainbow-me/rainbowkit';

function YourAppContent() {
  return (
    <div>
      <ConnectButton />
    </div>
  );
}
Step 5: Access Connection State
Use Wagmi hooks to read the connected Universal Profile details:
import { useAccount, useChainId } from 'wagmi';

function YourAppContent() {
  const { address, isConnected, chain } = useAccount();
  const chainId = useChainId();

  return (
    <div>
      <ConnectButton />
      {isConnected && (
        <div>
          <p>Address: {address}</p>
          <p>Network: {chain?.name}</p>
          <p>Chain ID: {chainId}</p>
        </div>
      )}
    </div>
  );
}
Step 1: Install Dependencies
npm install @reown/appkit @reown/appkit-adapter-wagmi wagmi @tanstack/react-query
Step 2: Configure the WagmiAdapter with LUKSO
Set up the adapter with LUKSO network configuration:
import { WagmiProvider } from 'wagmi';
import { createAppKit } from '@reown/appkit/react';
import { WagmiAdapter } from '@reown/appkit-adapter-wagmi';
import { lukso } from '@reown/appkit/networks';
import { QueryClient, QueryClientProvider } from '@tanstack/react-query';

// Wagmi uses QueryClient to manage cache, background updates, and request deduplication.
// This is required to provide <QueryClientProvider> higher up in your component tree.
const queryClient = new QueryClient();

const wagmiAdapter = new WagmiAdapter({
  projectId: 'YOUR_PROJECT_ID', // Get your project ID from ReOwn dashboard
  networks: [lukso],
  transports: {
    [lukso.id]: http('https://rpc.mainnet.lukso.network'),
  },
});
Step 3: Create the AppKit Modal
Initialize the modal with your dApp metadata and LUKSO-specific settings:
const metadata = {
  name: 'LUKSO Wallet Connect',
  description: 'Connect your Universal Profile',
  url: 'https://universaleverything.io',
  icons: ['https://lukso.network/favicon.ico'],
};

createAppKit({
  adapters: [wagmiAdapter],
  projectId: 'YOUR_PROJECT_ID', // Get your project ID from ReOwn dashboard
  networks: [lukso],
  defaultNetwork: lukso,
  metadata,
  features: {
    analytics: false,
    email: false,
    socials: false,
  },
});
Step 4: Wrap Your App with the Provider
Wrap your application with the required providers in the correct order:
function App() {
  return (
    <WagmiProvider config={wagmiAdapter.wagmiConfig}>
      <QueryClientProvider client={queryClient}>
        {/*
        Place your main application content here.
        <YourAppContent />

        This ensures that all components within <YourAppContent />
        have access to the connected wallet context provided by WagmiProvider,
        enabling features like reading connection state or sending transactions.
      */}
      </QueryClientProvider>
    </WagmiProvider>
  );
}
Step 5: Use the Connect button and access to connection state
Use Wagmi hooks to read the connected Universal Profile details:
import { useAccount, useChainId } from 'wagmi';

function YourAppContent() {
  const { address, isConnected, chain } = useAccount();
  const chainId = useChainId();

  return (
    <div>
      <appkit-button />
      {isConnected && (
        <div>
          <p>Address: {address}</p>
          <p>Network: {chain?.name}</p>
          <p>Chain ID: {chainId}</p>
        </div>
      )}
    </div>
  );
}
Optional: Configure the DeepLink for UP Mobile
DeepLink can be configured for QR login when using the UP Mobile app with ReOwn (WalletConnect).
Simply replace the wc: alias with io.universaleverything.universalprofiles://wallet-connect/:
const exampleWcUri =
  'wc:8c4d7a9e5f2b3c1d@2?relay-protocol=irn&symKey=a1b2c3d4e5f6g7h8i9j0k1l2m3n4o5p6';
const exampleDeepLink = exampleWcUri.replace(
  'wc:',
  'io.universaleverything.universalprofiles://wallet-connect/',
);
Provider Injection
You can use the window.lukso object, tailored for a direct integration with the UP Browser Extension. This approach allows developers to engage directly with the UP Browser Extension without the need to consider compatibility with other extensions.
- viem
- ethers
- web3
npm install viem
npm install ethers
npm install web3
- viem
- ethers
- web3
import { createWalletClient, custom } from 'viem';
import { lukso } from 'viem/chains';

const client = createWalletClient({
  chain: lukso,
  transport: custom(window.lukso),
});

const accounts = await client.requestAddresses();
console.log('Connected with', accounts[0]);
import { ethers } from 'ethers';
const provider = new ethers.BrowserProvider(window.lukso);

const accounts = await provider.send('eth_requestAccounts', []);
console.log('Connected with', accounts[0]);
import Web3 from 'web3';
const provider = new Web3(window.lukso);

const accounts = await provider.eth.requestAccounts();
console.log('Connected with', accounts[0]);
Alternatively to the window.lukso, the equivalent window.ethereum object can be called within supported browsers, just like other Ethereum wallets. Both follow the EIP-1193 Ethereum Provider JavaScript API. You can use a simple fallback to allow regular wallet connections, if the Universal Profile Browser Extension is not installed:
- viem
- ethers
- web3
import { createWalletClient, custom } from 'viem';
import { lukso } from 'viem/chains';

const client = createWalletClient({
  chain: lukso,
  transport: custom(window.lukso || window.ethereum),
});
const provider = new ethers.BrowserProvider(window.lukso || window.ethereum);
const provider = new Web3(window.lukso || window.ethereum);
Provider Discovery
If you want to implement Injected Provider Discovery you can visit our Example EIP-6963 Test dApp.
Using EIP-6963 Provider Discovery is the latest industry standardization, solving previous connectivity issues when having multiple wallet extensions installed at the same time.
You can listen to eip6963:announceProvider events following the EIP-6963: Multi Injected Provider standardization to facilitate a more versatile connection to multiple wallet extensions. This method is beneficial for developers who require the ability to maintain low-level control over how different extensions are targeted and managed within their dApp.
Step 1: Install Dependencies
npm install viem
Step 2: Implement Provider Discovery
import { createWalletClient, custom } from 'viem';
import { lukso } from 'viem/chains';

let providers = [];

window.addEventListener('eip6963:announceProvider', (event) => {
  providers.push(event.detail);
});

// Request installed providers
window.dispatchEvent(new Event('eip6963:requestProvider'));

// ... pick a provider to instantiate (providers[n].info)

// Create a wallet client using the selected provider
const walletClient = createWalletClient({
  chain: lukso,
  transport: custom(providers[0].provider),
});

const accounts = await walletClient.requestAddresses();
console.log('Connected with', accounts[0]);